Introduction
Cleanfligh is one of the 3 major software stacks for making a drone flying. The other 2 are betaflight and inav.
All this software stack are forked from a common source the multiwii project, and they generate firmware to be used in flight controllers or drive controllers based on STM32FX microprocessor family from STMicroelectronics.
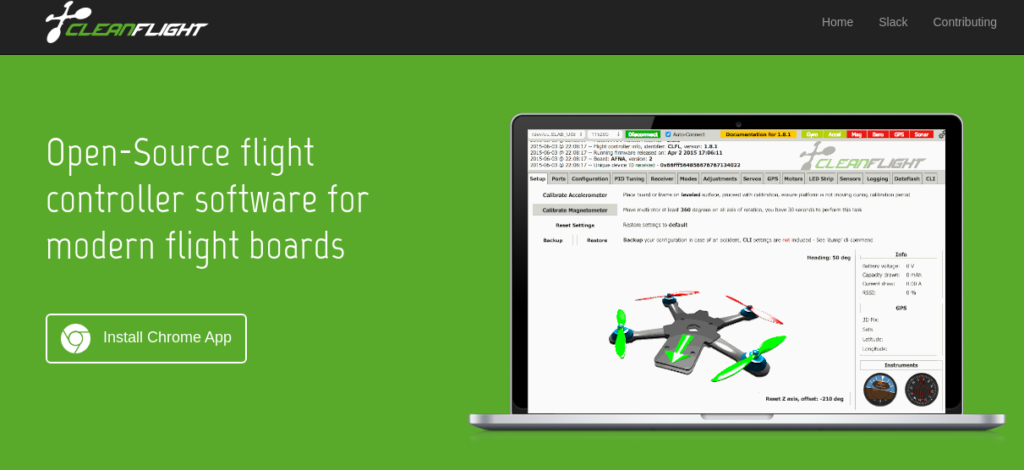
Cleanfligh comes with a neat interface to do the firmware configuration. It runs as a Google app (nice choice, not so wise the choice from betaflight and inav). Running the app itself is straightforward as soon as you have chrome or chromium installed in your system.
The trick part or the hard part is the USB driver that this boards normally have, a USB to UART bridge CP210x family chip from Silicon Labs.
The installation on Windows follow the standard procedure by running an installation application in elevate mode and sometimes reboot the PC.
In Linux is a bit different, the provided module needs to be compiled and installed.
Let me explain to you the steps from the beginning:
Step #1 – Install Chromium and cleanflight latest version
lukidrone@lukidrone:~$ sudo apt install chromiumRun chromium and install cleanflight :
Go to http://cleanflight.com/ and click on “install chrome app”
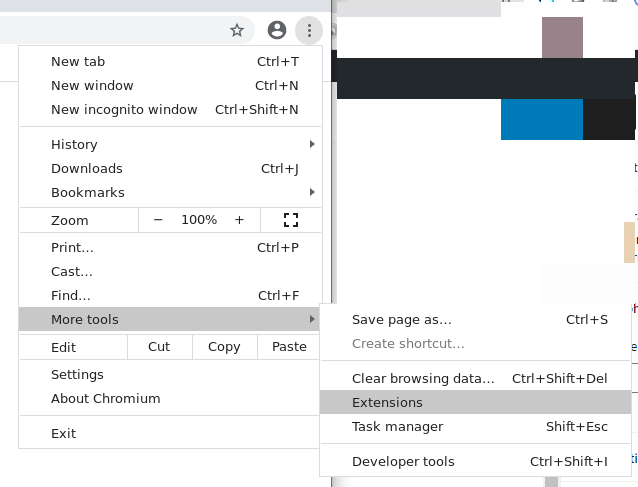
If you want to manage the app it should be in the extensions sections:
To run the application open the browser and enter the address chrome://apps/, finally click on the app icon
Step #2 Build and install the Linux kernel module for CP210x USB bridge
First to mention, that in my case I build the kernel module for Debian Buster amd64 virtual machine running under VMware. The steps for other Linux versions should be similar.
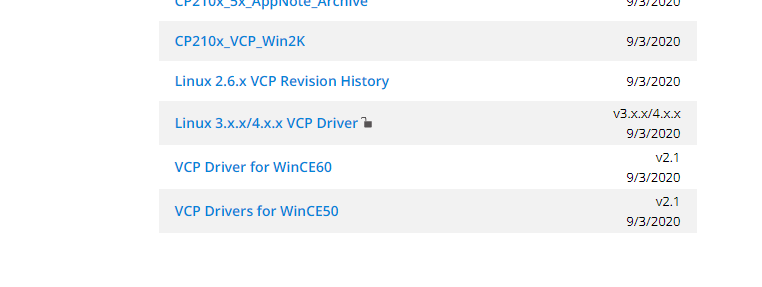
Step #2.1 – Download the linux module source code from Silicon Labs site:
https://www.silabs.com/developers/usb-to-uart-bridge-vcp-drivers
There you will find a download with a locker icon, you need to be logged in to download it.
Step #2.2 – Extract, install prerequisites and build
lukidrone@lukidrone:~/packages/cp210x$ sudo apt install linux-headers-$(uname -r)
lukidrone@lukidrone:~/packages/cp210x$ make
The output of the make is the cp210x.ko that need to be installed, in my case:
cp cp210x.ko /lib/modules/4.19.0-12-amd64/kernel/drivers/usb/serial/
lukidrone@lukidrone:~/packages/cp210x$ sudo insmod /lib/modules/4.19.0-12-amd64/kernel/drivers/usb/serial/usbserial.ko
lukidrone@lukidrone:~/packages/cp210x$ sudo insmod cp210x.ko
To check if the module was properly installed, execute the kernel log is follow mode and insert the usb cable from the Flight Controller. If everything was done properly you will see the follow output:
lukidrone@lukidrone:~/packages/cp210x$ sudo dmesg -w
[ 1999.807664] usbcore: registered new interface driver usbserial_generic
[ 1999.807671] usbserial: USB Serial support registered for generic
[ 2008.201999] cp210x: loading out-of-tree module taints kernel.
[ 2008.202058] cp210x: module verification failed: signature and/or required key missing - tainting kernel
[ 2008.202657] usbcore: registered new interface driver cp210x
[ 2008.202889] usbserial: USB Serial support registered for cp210x
[ 2070.091679] usb 2-2.2: new full-speed USB device number 6 using uhci_hcd
[ 2070.404278] usb 2-2.2: New USB device found, idVendor=10c4, idProduct=ea60, bcdDevice= 1.00
[ 2070.404285] usb 2-2.2: New USB device strings: Mfr=1, Product=2, SerialNumber=3
[ 2070.404289] usb 2-2.2: Product: CP2102 USB to UART Bridge Controller
[ 2070.404292] usb 2-2.2: Manufacturer: Silicon Labs
[ 2070.404294] usb 2-2.2: SerialNumber: 0001
[ 2070.419321] cp210x 2-2.2:1.0: cp210x converter detected
[ 2070.429608] usb 2-2.2: cp210x converter now attached to ttyUSB0
As you can see the device is communicating on port ttyUSB0
Step #3 Install the right CleanfLigh configuration version
Next you need to find the configurator version compatible with your cleanflight firmware.
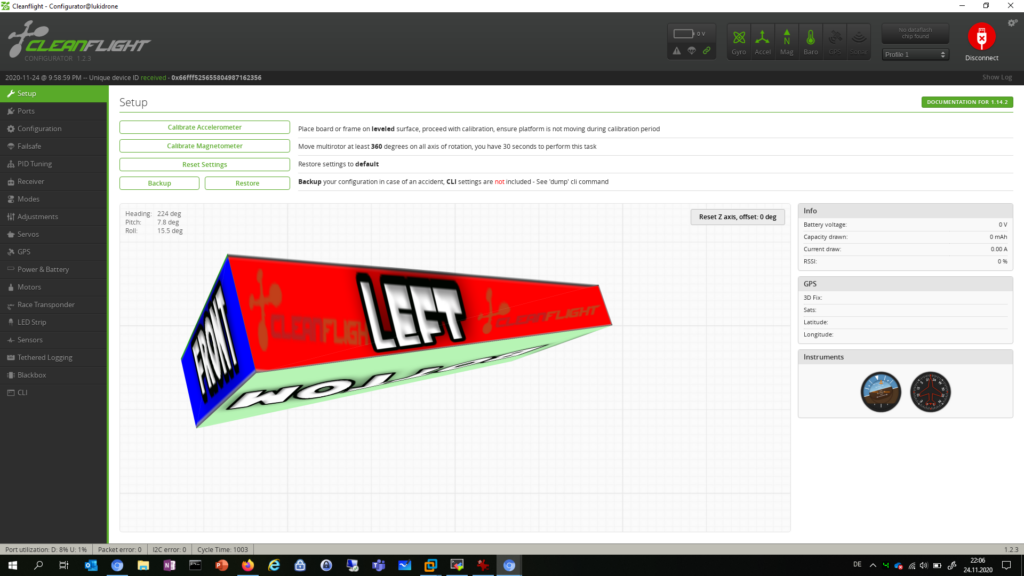
In my case I have a NAZE 1.14.2 (very old, from 2016) and it works with Cleanfligh Configurator 1.2.3.

If all is good, the configuration will be able to connect to the Fligh Controller and get the nice virtual model as showned below:
The previous steps should be valid for betafligh and inav with the exception on the installation procedure for the configurator.
I hope this helps you on your flying machine advetures.
If you search around you will find additional things about drones…
… please comment and see you soon!